If you’ve ever wondered why your voice sounds thin, muffled, or unclear on calls, streams, or recordings, the difference often comes down to how you test your mic. Whether for casual calls, podcasts, or content creation, knowing how to test your mic and properly optimize its setup is essential for clear, professional sound.
How a Mic Captures Sound
Understanding how your mic works will help you test it effectively:
- Your voice produces sound waves in the air.
- The mic converts these waves into an electrical signal.
- That signal is then amplified, processed, or recorded.
- The closer the mic is to your mouth, the cleaner and stronger the signal will be.
- Larger mic capsules capture more detail, while small laptop mics capture less depth.
Think of it like a camera: bigger lenses capture more detail; bigger capsules capture more natural sound.
Built-in Laptop Mic Test
Most laptops come with a tiny mic hidden near the webcam or keyboard. Testing it shows you its limits and helps improve clarity in calls.
How to Test
- Sit 20–30 cm from your screen.
- Use an online mic test tool like Online Mic Test or a free recording app.
- Speak at your normal voice level.
- Listen carefully to the playback for clarity, background noise, and echo.
Pros of Built-in Mics
- Always available, no setup required
- Free to use
- Works with any app automatically
- Battery-free
Cons of Built-in Mics
- Picks up keyboard and fan noise
- Can sound thin or hollow
- Far from your mouth, reducing clarity
- Sensitive to room echo and reverb
- Not suitable for professional recordings
Pro tip: If you type while speaking, your built-in mic will almost certainly pick up keystrokes. Testing will make this obvious so that you can adjust your setup.
External Mic Test
External mics connect via USB, 3.5mm jack, or professional audio interface. Proper testing ensures you get the best sound for calls, recordings, or streams.
How to Test
- Position the mic 10–20 cm from your mouth.
- Use a pop filter or foam cover to reduce harsh P and B sounds.
- Record in a quiet room with minimal background noise.
- Compare test recordings for clarity, depth, and noise rejection.
Pros of External Mics
- Clear, full, and natural voice
- Captures more detail and warmth
- Reduces background noise and echo
- Flexible positioning and angles
- Works well for streaming, recording, and professional calls
Cons of External Mics
- Costs extra money
- Requires setup and desk space
- XLR types need additional equipment, like an audio interface
Pro tip: Test different distances and angles to find the optimal position for your voice. Small adjustments can dramatically improve clarity.
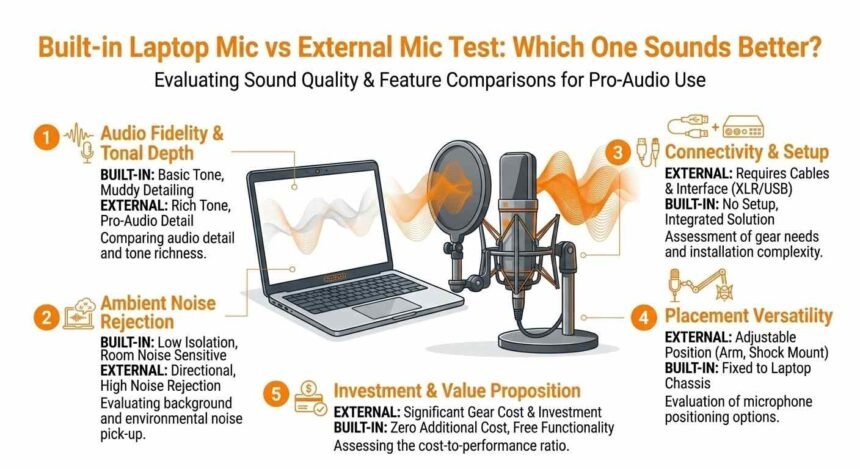
Side-by-Side Sound Test
To compare both types, test these factors in the same environment:
| Factor | Built-in Laptop Mic | External Mic | Winner |
|---|---|---|---|
| Voice Clarity | Thin, muffled | Clear, rich | External |
| Background Noise | High | Low | External |
| Keyboard Noise | Loud | Minimal | External |
| Fan Noise | Often audible | Rarely | External |
| Bass & Warmth | Weak | Strong | External |
| Frequency Range | Narrow | Wide | External |
| Convenience | Always ready | Needs setup | Built-in |
| Cost | Free | Extra | Built-in |
| Portability | Always with you | Extra item | Built-in |
| Room Echo | Captures reflections | Less echo | External |
Testing tip: Record the same sentence with both mics and listen through headphones to notice subtle differences.
Best Use Cases for Each Mic
| Situation | Recommended Mic |
|---|---|
| Quick video calls | Built-in |
| Zoom/Teams calls | Built-in or external |
| Streaming or gaming | External preferred |
| YouTube content | External |
| Podcasts | External |
| Music or voiceover recording | External |
| On-the-go calls | Built-in |
What Affects Your Mic Test Results
Even the best external mic can sound bad if other factors are ignored.
1. Distance From Your Mouth
Closer = stronger, clearer signal. 10–20 cm is ideal for most external mics.
2. Room Acoustics
- Hard walls = echo and reverb
- Soft surfaces = absorb reflections
- Carpets, curtains, bookshelves, and padded furniture reduce echo
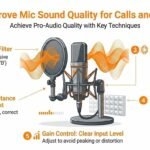
3. Gain and Volume Settings
- Too high = distorted, harsh sound
- Too low = weak, noisy recording
- Always test different gain settings to find the sweet spot
4. Background Noise
Fans, AC, traffic, and other people affect your test results. Reduce noise before testing.
5. Polar Pattern
- Cardioid: picks up sound from the front, ideal for solo recording
- Omnidirectional: picks up all around, less ideal for noisy rooms
Advanced Tips to Improve Any Mic Test
For Built-in Mics
- Lean closer to the screen
- Mute yourself when not speaking
- Close windows and reduce fan noise
- Use built-in noise suppression in Zoom, Teams, or Discord
- Test your volume before important calls
For External Mics
- Keep 10–20 cm from your mouth
- Use a pop filter to reduce plosives
- Mount on a stand or boom arm to prevent desk vibrations
- Point slightly off-axis for cleaner recordings
- Add soft furnishings or blankets to reduce echo
Software Tools to Enhance Sound
- Krisp: AI noise removal for calls
- NVIDIA RTX Voice: Real-time noise suppression
- Audacity: Free audio editor for noise reduction, EQ, and compression
- Adobe Podcast AI: Enhances recordings automatically
Pro tip: Hanging a thick blanket behind your setup can dramatically reduce reflections and instantly improve test results.
Testing Tricks You Can Use
- Clap or snap your fingers to detect room echo
- Record the same phrase multiple times at different distances
- Test with different gains and input levels
- Compare results using headphones rather than speakers
- Use online mic test tools to check frequency response and volume
Buying Guide: Choosing the Right External Mic
Start With Your Budget
- Under $50: USB clip-on or small condenser
- $50–$100: Entry-level USB for streaming or content creation
- $100–$200: Popular with podcasters, streamers, and video creators
- $200+: Professional XLR mics with audio interface for studio use
Consider Your Use Case
- Calls & casual use → small USB or headset mic
- Podcasting → large-diaphragm condenser
- Streaming → cardioid USB mic with noise rejection
- Music → XLR condenser with audio interface
- Travel → compact USB-C or lavalier mic
Test Before You Buy
- Listen to sample recordings on YouTube
- Check real user reviews with audio samples
- Consider connection type: USB is plug-and-play, XLR is more flexible
Final Verdict
Testing your mic before any call, stream, or recording ensures you always sound clear and professional. External mics generally outperform built-in mics, but proper testing and setup make the biggest difference.
Even a $30 USB mic, tested and positioned correctly, can sound much better than a built-in laptop mic. Combine good placement, a quiet environment, and optional software tools to maximize your sound.
Start today: Run a quick test, make small adjustments, and notice the difference immediately.